How to Seal a Kitchen Sink Drain: Stop Leaks Without Losing Your Mind

You finish washing the dishes, wipe the counter, and admire your sparkling sink. Life is good. Then you open the cupboard underneath and discover a puddle.
Thank you for reading this post, don't forget to subscribe!Congratulations. Your kitchen has just promoted you to an unpaid plumbing detective.
Before you buy every tube of sealant at the hardware store, take a breath. Learning how to seal a kitchen sink drain starts with finding exactly where the water escapes. The solution might be plumber’s putty, compatible silicone sealant, or a replacement rubber gasket. Choose the wrong one, and that little drip could become your least favourite household guest.
Let’s fix it properly, save you unnecessary spending, and get that cupboard dry again.
The quick answer
To seal a kitchen sink drain, first identify the leak. Use plumber’s putty beneath a compatible drain flange when permitted by the manufacturer, or silicone when the assembly specifies a compatible silicone sealant. If a rubber gasket is damaged, replace it. Reassemble the drain correctly and test for leaks before returning the sink to normal use.
1. How to Tell Where Your Kitchen Sink Drain Is Leaking
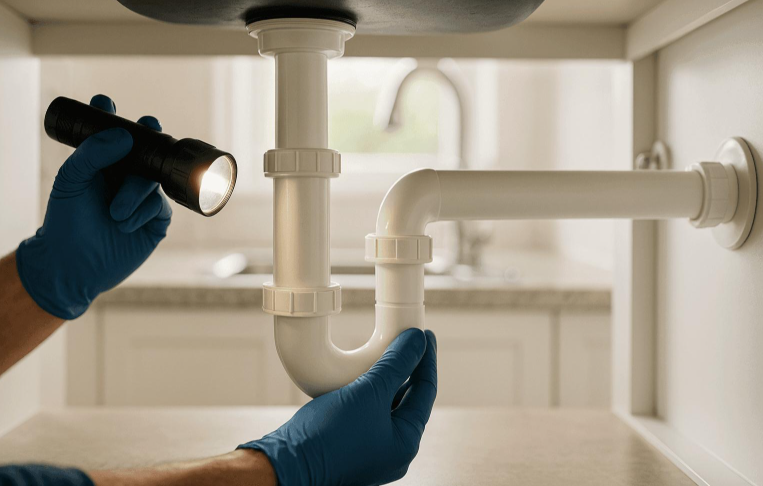
Before buying anything, play detective. Water is sneaky. It can travel along a pipe before dripping somewhere else, making the wrong component look guilty.
Empty the cupboard, place a bucket underneath the plumbing, and dry every visible pipe and connection. Run a little water into the sink while checking the area with a flashlight and dry tissue.
Watch for these common trouble spots:
- Around the drain opening: The seal between the drain flange and sink may have failed.
- Beneath the drain: A worn, damaged, or misplaced gasket could be responsible.
- At threaded connections: A loose fitting, damaged washer, or poorly aligned joint may be leaking.
- Around the P-trap: The curved pipe underneath may have a faulty washer, loose connection, or crack.
If the leak appears when water enters the basin, inspect the flange and drain body. If it appears as water drains away, examine the drain connections and P-trap.
Pro tip: Find the first place that becomes wet. Don’t assume the lowest dripping point is the source.
2. What Is the Best Sealant for a Kitchen Sink Drain?
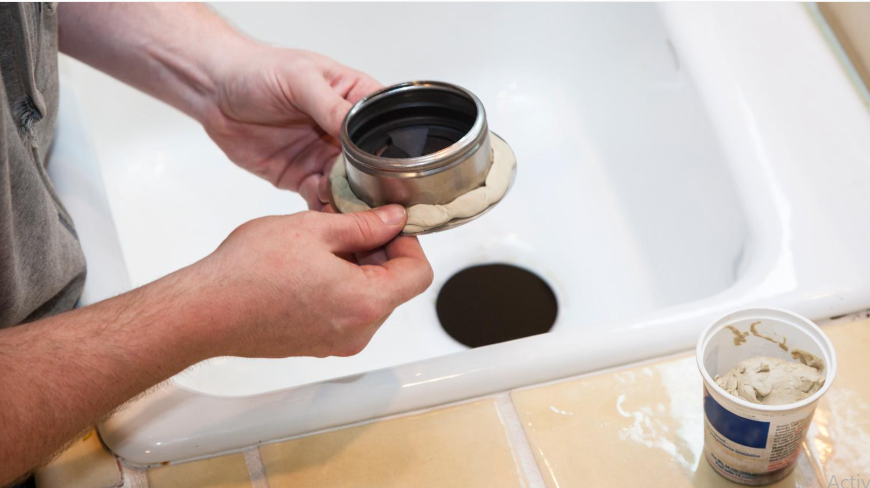
Choosing the best sealant for a kitchen sink drain depends on your drain design, sink material, and manufacturer’s instructions.
| Material | Best use | Watch out for |
|---|---|---|
| Plumber’s putty | Suitable drain-flange seals | May stain or damage incompatible materials |
| Silicone sealant | Drain assemblies specifying compatible silicone | Requires the specified curing time |
| Rubber gasket | Joints designed to use a gasket | Must be correctly sized and seated |
| Replacement drain kit | Worn or damaged drain components | Must match your existing plumbing |
Plumber’s putty: The classic choice
Plumber’s putty is a soft, mouldable compound used beneath many compatible drain flanges. Roll it into a rope, position it beneath the flange, and compress it during installation.
It’s easy to handle and generally doesn’t require curing like silicone.
However, some stone, composite, acrylic, and plastic surfaces can be damaged or stained by incompatible putty. Always check the sink and drain manufacturer’s guidance.
Silicone sealant: Flexible and durable
Silicone sealant is suitable for drain assemblies that specify it. It adheres to compatible surfaces and cures into a flexible seal.
Follow the product instructions for preparation, application, and curing. A surface that feels dry isn’t necessarily ready for water.
Rubber gaskets: Small parts, big responsibilities
A rubber gasket creates a seal at a designated joint. If it becomes cracked, flattened, brittle, or distorted, replacing it is often more effective than adding sealant.
The golden rule: Use the correct material for the joint. More sealant does not mean a better repair.
3. Understand Your Kitchen Sink Drain Parts
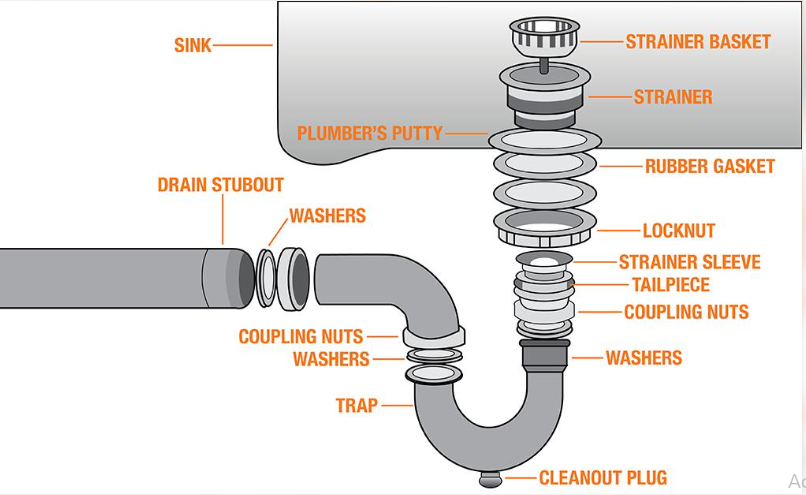
Before dismantling anything, get familiar with the parts. This will make the job easier and reduce the chances of finishing with three mysterious washers and no idea where they belong.
- Drain flange: The visible rim around the drain opening.
- Basket strainer: The removable basket in many kitchen sink drains.
- Gasket: A component that seals a designated joint.
- Friction washer: Helps distribute pressure in certain assemblies.
- Locknut: Secures the drain assembly beneath the sink.
- Tailpiece: The pipe extending down from the drain.
- P-trap: The curved pipe that retains water to help block sewer gases.
Not every drain has the same arrangement.
If you need a kitchen sink drain kit, check the drain opening dimensions, connection sizes, sink thickness requirements, and compatibility with your existing plumbing.
Take a photograph before removing anything. Your future self will thank you when it’s time to put everything back together.
4. Tools and Materials You Need
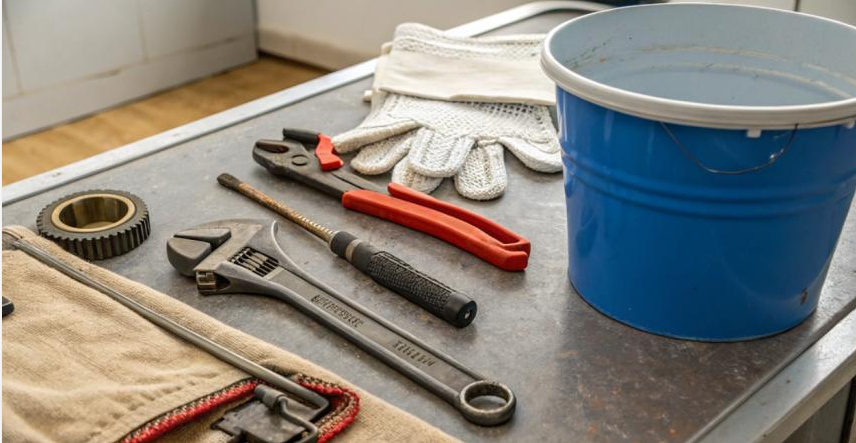
Gather your supplies before starting. Nothing kills DIY enthusiasm faster than discovering your only wrench has vanished into another dimension.
Your checklist:
- Adjustable wrench or suitable pliers
- Bucket and towels
- Flashlight
- Cleaning cloth and compatible cleaner
- Non-abrasive scraper
- Appropriate plumber’s putty or silicone
- Replacement kitchen sink rubber gasket, if needed
- Replacement drain components, if damaged
You may not need everything. If the gasket is faulty, replacing it may solve the problem without replacing the entire drain.
Avoid forcing corroded fittings or working around electrical equipment exposed to water. If the drain is cracked or badly damaged, consider calling a plumber.
5. How to Seal a Kitchen Sink Drain Step by Step
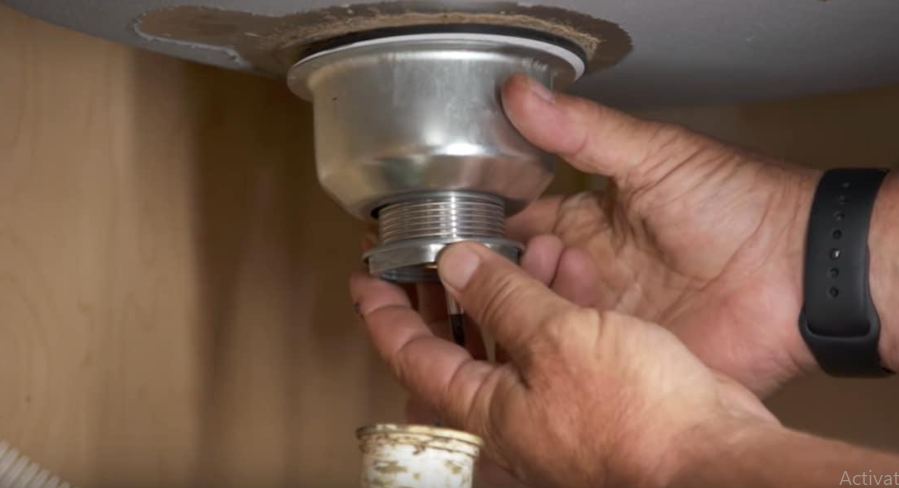
Now we’re getting somewhere. This method covers a typical basket-strainer drain that needs removing and resealing. Your particular assembly may differ, so follow its manufacturer’s instructions.
Step 1: Prepare the workspace
Empty the cabinet and place a bucket beneath the plumbing.
If you need to disconnect the drainpipe, remember that the P-trap contains water. Loosen the connections carefully and empty the contents into the bucket.
Disconnect only what’s necessary. You’re repairing a drain, not auditioning for a complete plumbing-system demolition.
Step 2: Remove the drain assembly
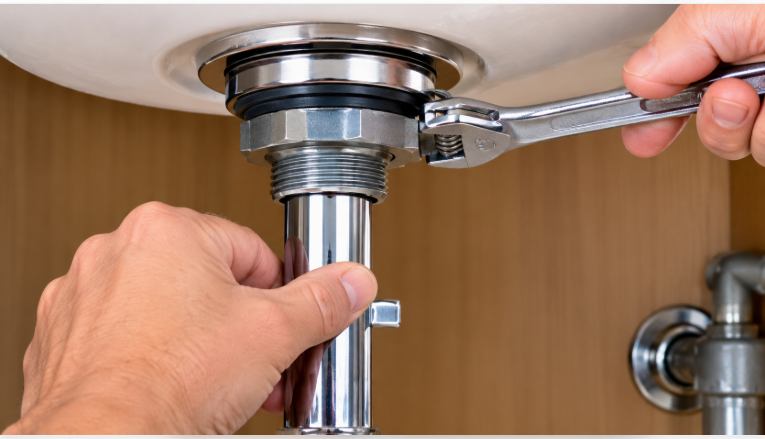
Locate the retaining nut or locknut beneath the sink and loosen it with a suitable tool.
Support the components as you work. Depending on the design, you may need someone to hold the drain flange from above while you loosen the hardware underneath.
Avoid scratching the sink or forcing stubborn fittings. If components are severely corroded, professional assistance may prevent further damage.
Step 3: Clean the drain opening
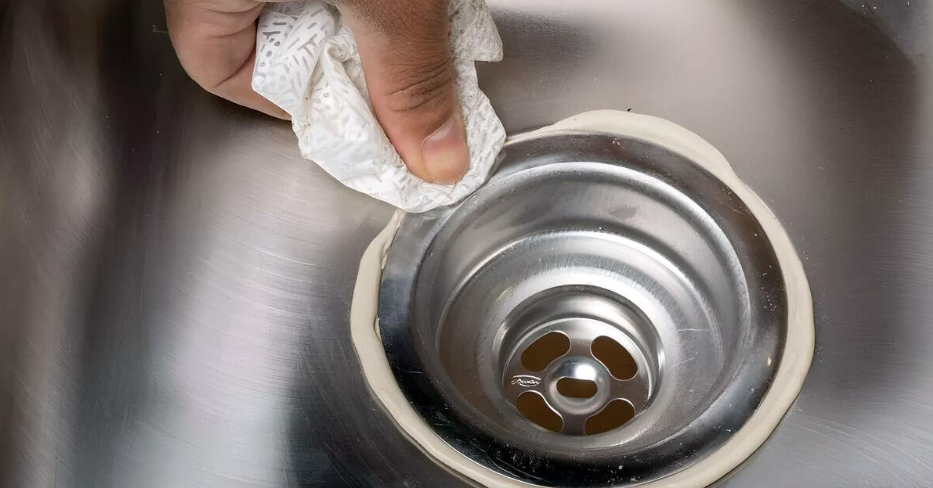
Remove old putty or silicone from the flange and sink opening. Use a suitable scraper and cleaner that won’t damage the surface.
Remove grease, debris, and loose residue, then dry the surfaces as required by the sealant manufacturer.
This step is essential. Applying fresh sealant over dirt and old material is like painting a dirty wall and expecting the paint to hold forever.
Inspect the flange and sink opening for cracks, corrosion, or damage. Replace defective components before reassembly.
Step 4: Apply the correct sealing material
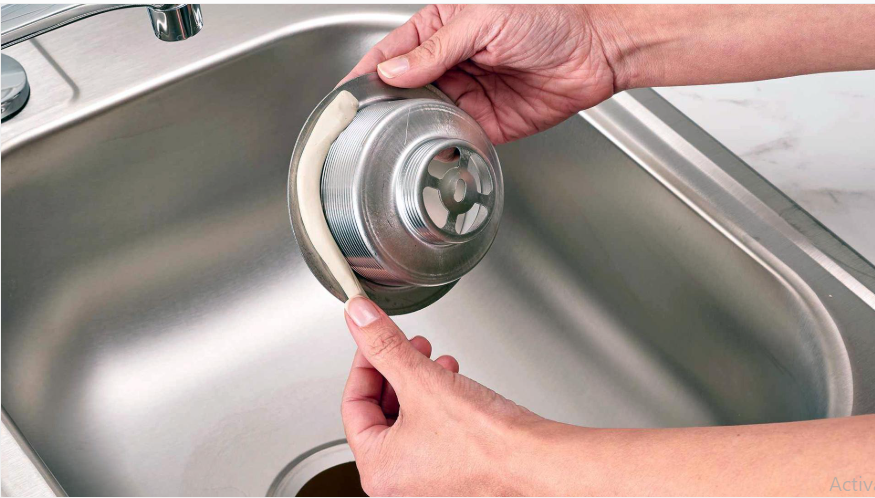
If plumber’s putty is approved for your sink and drain, roll a small amount into an even rope. Place it beneath the drain flange as directed by the manufacturer.
If the assembly specifies silicone, prepare the surfaces and apply a compatible product in the recommended pattern.
Don’t use both materials indiscriminately. The correct choice depends on the assembly.
Avoid applying excessive material. You need an effective seal, not enough putty to build a small island around your drain.
Step 5: Refit and tighten the drain
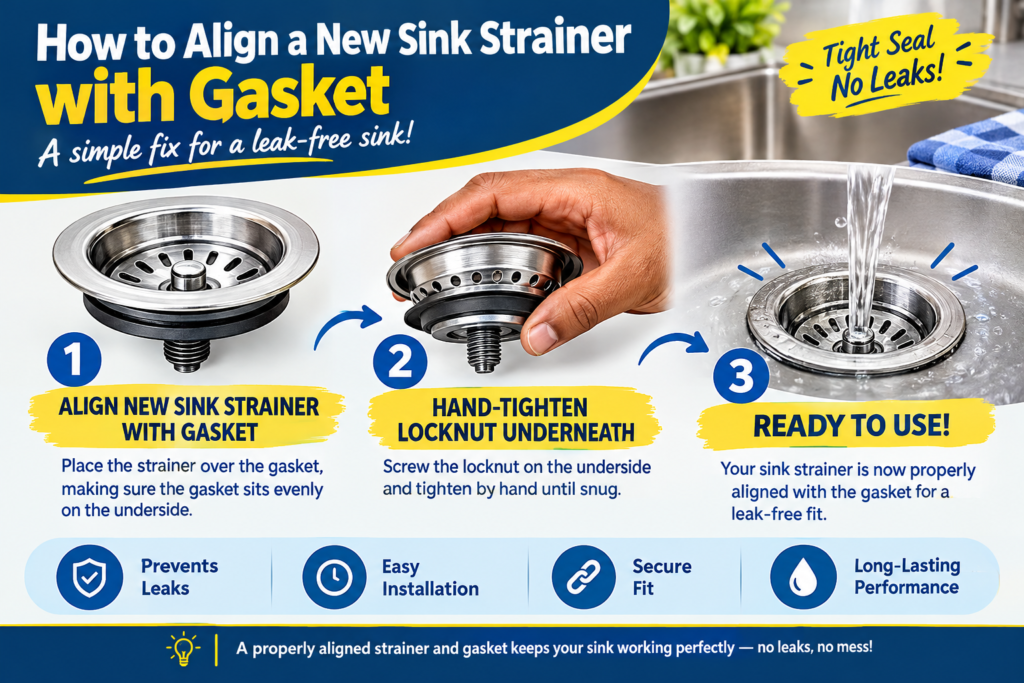
Position the drain flange in the opening. Underneath, reinstall the required gasket, washers, and retaining hardware in the correct order.
Tighten the locknut gradually and evenly according to the manufacturer’s instructions.
Don’t overtighten it. Excessive force can distort a gasket, damage plastic fittings, or crack components.
Remove excess putty neatly. If using silicone, follow the product instructions for finishing the seal.
Step 6: Reconnect the drainpipe
Reconnect the tailpiece and any disconnected fittings. Ensure washers are seated correctly and pipe sections align naturally.
Many slip-joint connections rely on correctly fitted washers to seal. Thread tape or silicone isn’t a universal solution for these joints.
Use the correct assembly method and avoid forcing misaligned pipes into place.
If silicone was used, wait for the specified curing period before testing the repair.
Step 7: Test your repair
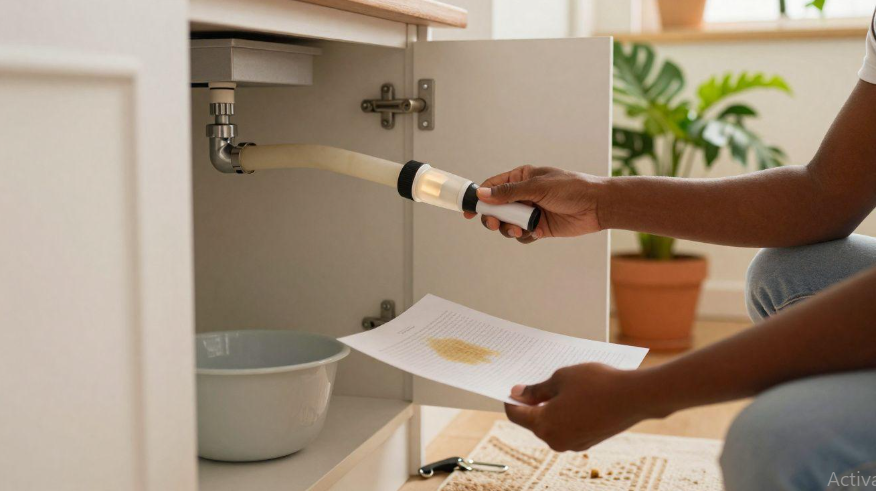
Once everything is assembled and the sealant has cured as required, run a small amount of water into the sink.
Check around the drain flange and inspect the underside with a flashlight and dry tissue.
Next, let the water drain while checking the tailpiece, connections, and P-trap. If everything stays dry, gradually increase the amount of water.
If a leak appears, stop and identify the source before attempting another repair.
A successful job leaves the cupboard dry. “It only leaks a little” is not a victory; it’s a sequel.
6. How to Replace a Kitchen Sink Rubber Seal
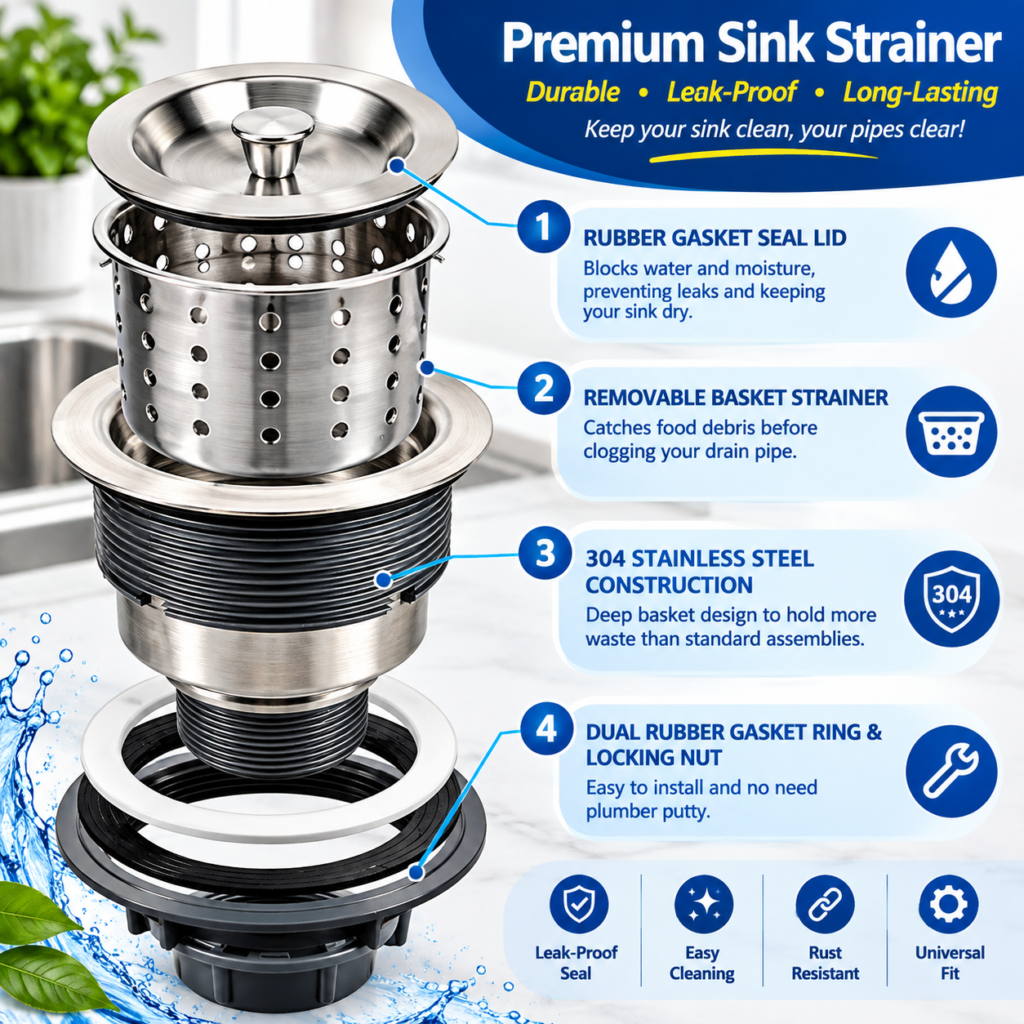
Sometimes the sealant isn’t the problem. The kitchen sink rubber gasket may simply be worn out.
Look for cracks, flattened areas, brittleness, swelling, or deformation. A damaged gasket may not seal properly, even when the retaining nut is tight.
Here’s how to replace it:
- Identify the drain model or measure the existing gasket.
- Remove the necessary drain components.
- Take out the old gasket and clean the mating surfaces.
- Fit the correct replacement in the specified position.
- Reassemble and tighten the hardware correctly.
- Test the connection for leaks.
Rubber seals differ in shape, size, and position. Match the replacement to the actual assembly rather than buying one that merely looks similar.
Avoid adding sealant to a gasket joint unless the manufacturer recommends it. Extra material can interfere with the gasket’s intended fit.
7. How to Fix a Kitchen Sink Drain That Still Leaks

You’ve completed the repair, but a drop of water appears again. Before declaring war on your kitchen, check these possibilities.
Leak around the top flange
The seal may be uneven, contaminated, or incompatible with the sink material. Remove and reseal it correctly if necessary.
Leak beneath the drain
Inspect the gasket arrangement, seating surfaces, and retaining hardware. Replace worn components.
Leak at a pipe connection
Check the washer, alignment, and condition of the joint. Correct the faulty connection rather than applying sealant everywhere.
Water appears when the sink isn’t being used
Inspect the faucet and supply lines too. The drain isn’t automatically responsible for every puddle beneath the sink.
If the drain is cracked, the fittings are badly corroded, or the leak persists after correct reassembly, a plumber can help identify the underlying problem.
8. Common Mistakes to Avoid
Avoid these common mistakes when sealing a kitchen sink drain:
- Applying sealant over dirty surfaces.
- Using products incompatible with the sink or drain.
- Ignoring a damaged rubber gasket.
- Overtightening the locknut.
- Running water before silicone has cured.
- Sealing every connection indiscriminately.
- Ignoring cracks or persistent leaks.
One particularly common mistake is confusing sink caulk with a drain seal. Caulk around the countertop or backsplash helps seal the sink’s perimeter. It doesn’t repair a faulty gasket or leaking drain connection.
Use the right product in the right place. Your plumbing will appreciate the distinction, even if it never says thank you.
9. Frequently Asked Questions
Can I use silicone instead of plumber’s putty?
Sometimes. Check the drain design, sink material, and manufacturer’s instructions. Use a compatible silicone product when specified.
How do I reseal a sink drain without replacing everything?
If the components are in good condition, remove the assembly as necessary, clean the surfaces, replace the failed seal, and reinstall it correctly. Replace damaged parts rather than trying to cover them up.
Why is my kitchen sink leaking underneath the drain?
Common causes include a failed flange seal, worn gasket, loose connection, or damaged component. Dry the plumbing and run water to identify the first place that becomes wet.
How long should I wait before using the sink after applying silicone?
Follow the product label. Curing time varies with the formulation, bead thickness, temperature, and humidity. A dry surface doesn’t necessarily mean the seal is fully cured.
Final Thoughts: Stop the Leak at Its Source
Sealing a kitchen sink drain doesn’t have to be a nightmare. Find the source of the leak, choose the correct sealing material, replace damaged components, and test your work.
Use plumber’s putty where permitted, compatible silicone where specified, and the right replacement gasket when needed.
A little patience now can save you a lot of frustration later.
And the best part? You can open that cupboard tomorrow without wondering whether your kitchen has secretly become a swimming pool.