How to Glue MDF Boards Together: A Step-by-Step Guide
You have your MDF boards, your project plan, and just enough confidence to believe this weekend’s DIY project will go smoothly. Then comes the big question: how do you glue those boards together so they stay together?
Thank you for reading this post, don't forget to subscribe!Because let’s be honest: nobody wants to spend Saturday building a beautiful cabinet only to find its joints opening up by Monday. That’s not furniture. That’s a very expensive puzzle.
The good news? Learning how to glue MDF boards together is easier than you might think. You don’t need a workshop full of professional tools or a woodworking degree. You need the right adhesive, properly prepared surfaces, good alignment, and a little patience.
In this guide, we’ll look at the best glue for MDF, how to apply it correctly, how to clamp your boards, and when screws or dowels can give your joints extra strength. I’ll also share a few practical tricks that can help you avoid the mistakes that turn a promising DIY project into a pile of loose boards.
Let’s get those boards sticking together for the right reasons!
What Is the Best Glue for MDF Boards?
Not all glues are created equal, and MDF can be surprisingly picky about what you use on it.
MDF stands for medium-density fibreboard. It’s made from fine wood fibres bonded together under heat and pressure, creating a smooth, consistent board that’s popular for shelves, cabinets, wardrobes, desks, and all sorts of home projects.
But MDF has one little personality trait you need to understand: its cut edges are thirsty.
The exposed fibres can absorb adhesive quickly, especially when the edges are rough or dusty. That’s why applying a tiny drop of glue and hoping for the best isn’t always a winning strategy.
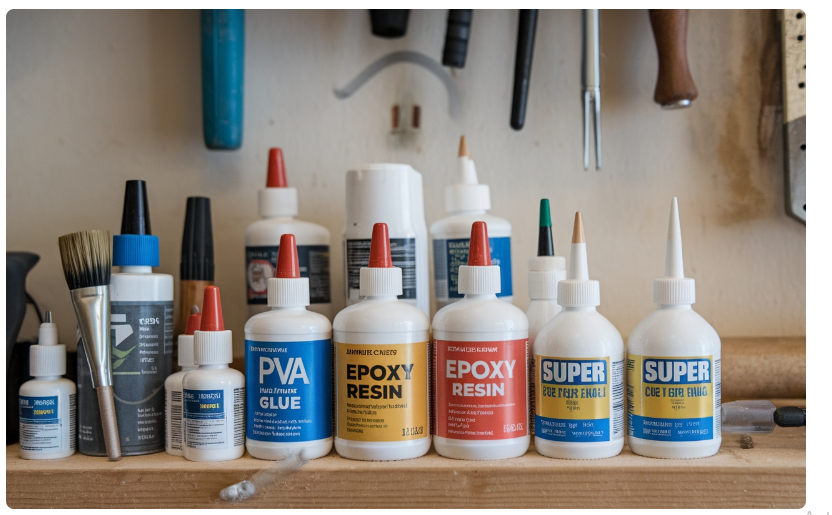
Here are the main adhesive options.
1. PVA wood glue: the best starting point for most projects
For ordinary indoor MDF projects, standard PVA wood glue is usually the first option I’d reach for.
It works well on clean, closely fitting MDF surfaces and is suitable for many everyday jobs, including:
- Joining MDF panels for cabinets and shelves.
- Attaching MDF trim and edging.
- Making simple furniture joints.
- Bonding two MDF pieces face-to-face.
It’s affordable, widely available, and generally easy to clean up before it dries.
My advice: Choose a reputable wood glue whose label specifies suitability for MDF or engineered wood. If your project may encounter moisture, choose an appropriately rated adhesive rather than assuming every PVA glue is waterproof.
2. Construction adhesive: useful for certain larger assemblies
Construction adhesive can be helpful when attaching MDF to another building material or when the product is specifically rated for the materials you’re joining.
However, don’t assume that every construction adhesive is suitable for every MDF joint. Some products require a particular gap, surface condition, or curing period.
Check the label before using it for a close-fitting furniture joint.
3. Epoxy: for specialist bonding jobs
Epoxy can offer strong adhesion in certain applications, especially where a particular material combination or repair requires it.
The downside? It can cost more, may require careful mixing, and can be less convenient than ordinary wood glue for routine woodworking.
For a simple MDF bookshelf, epoxy is usually more complicated than necessary.
4. Super glue: handy, but not your default choice
Cyanoacrylate, commonly called super glue, can be useful for small repairs or holding certain small components in position.
But a tiny, brittle bond isn’t automatically the right solution for a large panel or a joint that will experience repeated movement.
For most ordinary MDF-to-MDF joints, start with a suitable wood glue unless your particular application calls for something else.
The quick verdict
For most indoor MDF furniture and DIY projects, use a suitable PVA wood glue, prepare the surfaces carefully, and clamp the joint properly. Choose a different adhesive when the materials, moisture exposure, or joint design demand it.
Does Wood Glue Work on MDF?
Yes! Wood glue works very well on MDF when the surfaces fit properly and you use it correctly.
In fact, you don’t need a special industrial adhesive simply because your wood isn’t technically solid wood.
The important difference is how MDF behaves at its edges.
The smooth factory face is relatively dense, while a freshly cut edge exposes lots of compressed fibres. That edge can absorb glue more quickly than you expect.
Here’s a simple way to think about it: imagine trying to paint a smooth wall versus a rough, thirsty piece of cardboard. The surfaces behave differently, even when you’re applying the same liquid.
MDF behaves similarly when you apply adhesive.
The trick: prepare the surface, not just the glue
Before applying adhesive:
- Make sure the surfaces are clean and free of dust.
- Check that the boards fit together without large gaps.
- Lightly sand rough or damaged areas if needed.
- Remove all sanding dust before gluing.
- Apply enough adhesive to create continuous contact without flooding the joint.
Don’t automatically soak an MDF edge with repeated coats of glue. Follow the adhesive manufacturer’s instructions, particularly if it recommends a specific preparation method for porous materials.
And remember: glue can’t magically fill a badly fitting joint and turn it into a perfect one. If the edges are uneven, fix the fit before reaching for the bottle.
What You’ll Need Before You Start
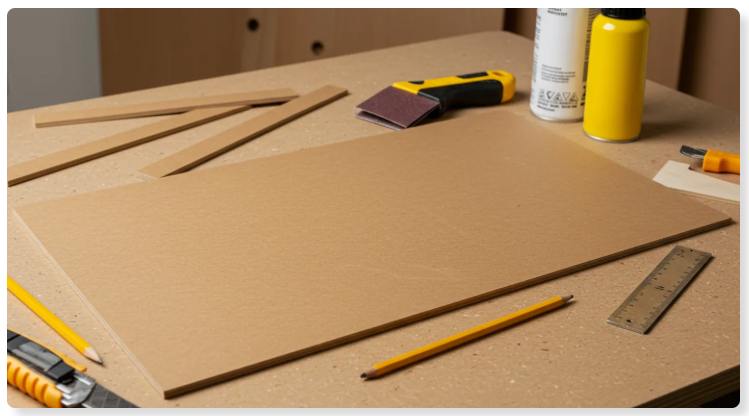
You don’t need a professional workshop. Gather these basics before opening the glue.
- MDF boards: Cut to the required dimensions.
- Suitable wood glue: Check the label for MDF compatibility.
- Clamps: Bar clamps or suitable woodworking clamps are ideal.
- Sandpaper: For smoothing rough edges and removing small imperfections.
- Clean cloth: For removing dust and fresh glue squeeze-out.
- Tape measure and pencil: For accurate positioning.
- A flat work surface: To help keep the assembly aligned.
- Optional screws or dowels: For joints that need additional mechanical support.
One extra item deserves attention: scrap wood for clamp pads. These small offcuts help distribute pressure and protect the MDF from dents caused by the clamp jaws.
A clamp should hold your project together, not leave it looking as though it lost an argument with a crocodile.
How to Glue MDF Boards Together: Step by Step
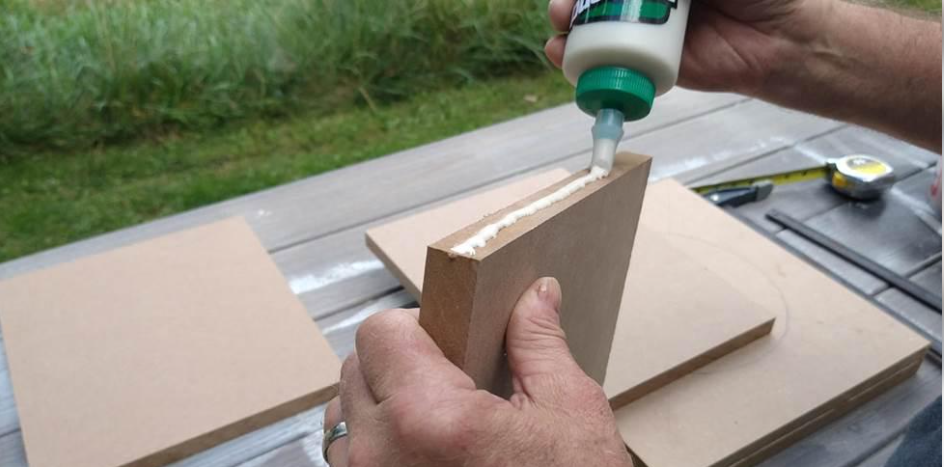
This is the part that matters most. Follow these steps carefully, and you’ll give your adhesive a much better chance of creating a reliable bond.
Step 1: Measure and plan the joint
Before touching the glue, decide exactly how the boards will meet.
Are you joining two edges to make a longer panel? Attaching a shelf to a cabinet side? Gluing two panels together to create a thicker piece?
The joint design influences the strength of the finished assembly.
Mark the position of each board with a pencil, and check that the dimensions make sense. If you’re building a cabinet, for example, verify that the shelf sits square against the side panel.
A few pencil marks now can save you from a lot of colourful language later.
Step 2: Dry-fit the boards
Place the boards together without glue.
Check for gaps, rocking, misalignment, and awkward corners. If the pieces don’t fit properly now, glue won’t improve the situation.
This is also the time to position your clamps and make sure you can reach them easily.
A useful trick: Practise tightening each clamp before applying adhesive. Once the glue is on the board, you don’t want to spend five minutes searching for the missing clamp handle.
Step 3: Prepare the MDF surfaces
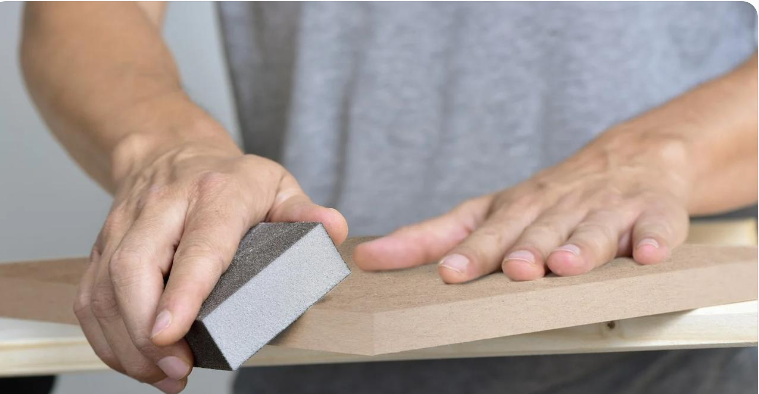
Inspect the areas you’ll be joining.
If an edge is rough, lightly sand it until the surface is even. Don’t aggressively round the edge, because you want the two boards to meet with as much contact as possible.
Wipe or brush away the dust using a clean method that doesn’t leave the MDF damp. The goal is a clean, dry surface.
If the board has a damaged edge, loose fibres, or a large gap, address that problem before proceeding.
Step 4: Apply the glue evenly
Apply a continuous bead of suitable wood glue to the joint surface.
You want enough adhesive to cover the contact area without creating a huge pool. Spread it evenly if the manufacturer’s instructions allow it.
Pay particular attention to exposed MDF edges, where absorption can be higher.
Here’s a useful distinction: a joint needs continuous adhesive coverage, not a dramatic mountain of glue.
Too little glue can leave dry spots. Too much creates messy squeeze-out and doesn’t automatically make the joint stronger.
If the adhesive label specifies a particular spreading method or open time, follow it.
Step 5: Bring the boards together
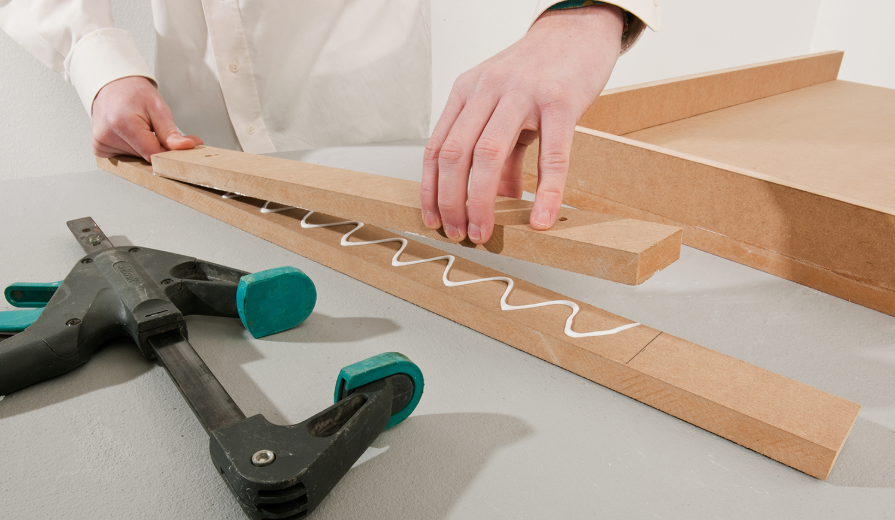
Bring the surfaces together carefully, following the marks you made earlier.
Press the boards into contact and check the alignment from more than one angle. Make sure the edges are flush where they should be and that the assembly hasn’t shifted.
For larger panels, it can help to have a second person hold the pieces while you position the clamps.
Don’t rush this step. A strong joint that’s crooked is still a crooked joint.
Step 6: Clamp the boards firmly
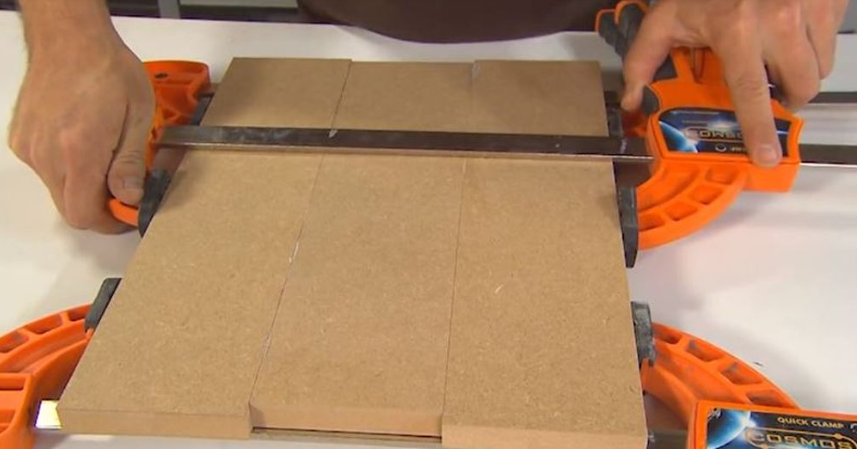
Clamps hold the boards in position while the adhesive develops its bond.
Position them so the pressure is distributed along the joint. Use scrap wood as pads where necessary to prevent the clamp jaws from marking the MDF.
Tighten the clamps until the boards are firmly in contact. A little squeeze-out can indicate that adhesive has reached the joint edges, but it isn’t a guarantee of a perfect bond.
Avoid excessive pressure. MDF can crush or dent, particularly near edges and corners.
The golden rule: Firm contact is the goal, not maximum force.
Step 7: Clean up the squeeze-out
Fresh glue that escapes from the joint can usually be cleaned up using the method recommended by the adhesive manufacturer.
A damp cloth may be suitable for many water-based PVA glues, but avoid soaking the MDF. Excess moisture can cause swelling, particularly along exposed edges.
If you’re planning to paint or stain the finished project, take extra care. Dried glue residue can interfere with paint adhesion or leave visible patches on the surface.
It’s much easier to clean the joint while the adhesive is still manageable than to scrape off a hardened mess later.
Step 8: Let the glue cure properly
This is where impatient DIYers sometimes sabotage perfectly good work.
The glue may feel firm long before it has reached its recommended full cure. Resist the temptation to remove the clamps early just because you want to see whether the joint survived.
Follow the manufacturer’s instructions for clamping time, handling time, and full curing time. Temperature, humidity, adhesive formulation, and joint conditions can all affect drying and curing.
And please don’t test the joint by immediately standing on it, twisting it, or loading it with every book you own.
Give it time.
What Is the Best Way to Join MDF Boards Together?
The best method depends on what you’re building. A small decorative box has different demands from a heavy bookshelf or a cabinet that will be opened and closed thousands of times.
Here are four common ways to join MDF.
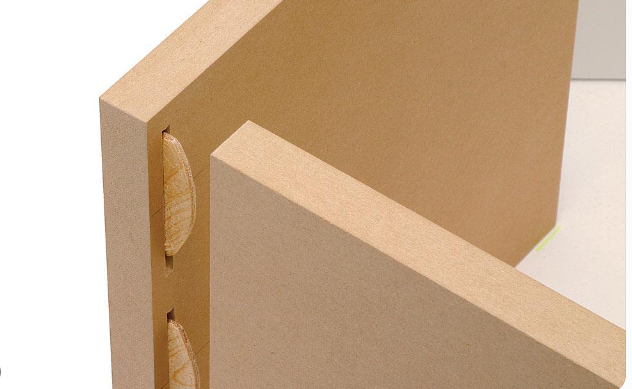
1. Butt joints: simple and beginner-friendly
A butt joint is made by placing the edge of one board against the face or edge of another.
It’s easy to make and works for many simple projects, but the strength depends on the joint’s design, the available bonding area, and the loads it must withstand.
For a basic decorative project, glue may be sufficient. For a cabinet or shelf carrying substantial weight, consider reinforcement.
2. Edge-to-edge joints: for wider panels
If you’re joining two MDF boards along their long edges to make a wider panel, accurate cuts and good alignment are essential.
Make sure the edges are straight and fit closely together. Use a flat surface to support the boards and clamps to maintain alignment while the glue cures.
This method can work well for suitable indoor panels, provided the joint is designed for the intended use.
3. Face-to-face joints: for thicker panels
Want to create a thicker MDF component by bonding two panels together? A face-to-face joint gives you a relatively large bonding area.
Apply adhesive evenly, align the panels, and use enough appropriately positioned clamps to maintain uniform contact.
Check for trapped debris and uneven pressure before the adhesive sets. Even a small piece of grit can leave an annoying bump between the layers.
4. Reinforced joints: for demanding projects
For furniture that needs additional support, consider a suitable combination of glue and mechanical reinforcement.
Depending on the design, this could include screws, dowels, biscuits, or purpose-designed joining hardware.
Reinforcement doesn’t eliminate the need for good adhesive coverage or accurate fitting. It simply provides another way to help the joint resist the forces it will encounter.
Should You Use Screws When Gluing MDF?
Sometimes, yes.
Glue and screws can complement each other, particularly in cabinet construction and other assemblies where joints need help resisting movement.
However, MDF doesn’t behave exactly like solid timber. Poorly positioned screws can damage the material, split an edge, or lose their grip.
If you use screws:
- Choose screws intended for MDF or suitable engineered wood.
- Drill appropriately sized pilot holes where recommended.
- Keep screws far enough from edges to reduce the risk of damage.
- Avoid overtightening, which can strip the material or crush it.
- Check the screw manufacturer’s guidance for the board thickness and application.
For a straightforward edge joint, screws aren’t automatically necessary. For a load-bearing assembly, evaluate the joint design and the expected load rather than assuming glue alone—or screws alone—will solve everything.
One important safety note: if you’re building a shelf or cabinet that could tip over, secure the finished unit appropriately to the wall or supporting structure.
Common MDF Gluing Mistakes to Avoid
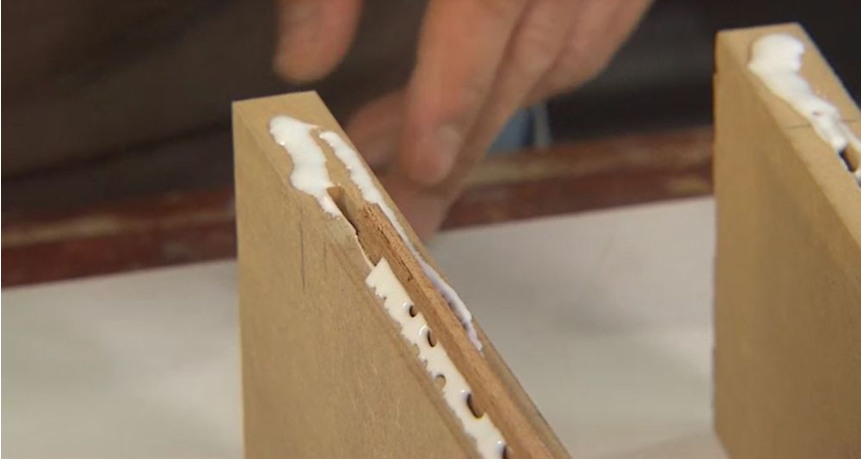
Even good glue can produce a disappointing result if the preparation is poor. Here are the mistakes worth avoiding.
Using dusty surfaces. Dust can interfere with direct contact between the adhesive and the MDF fibres. Clean the joint before gluing.
Assuming more glue means more strength. Excess adhesive creates mess without necessarily improving the bond. Aim for even coverage.
Clamping unevenly. If one part of the joint is pressed together while another remains open, the bond may be inconsistent. Position clamps to distribute pressure.
Using damaged or uneven edges. Glue isn’t a substitute for accurate cutting. Improve the fit before assembly.
Removing clamps too early. Follow the manufacturer’s specified clamping time rather than guessing.
Ignoring moisture. Standard indoor MDF and ordinary interior wood glue aren’t automatically suitable for damp environments. Choose moisture-resistant materials and adhesive systems when the application requires them.
Forgetting the finish. Dried glue can spoil the appearance of painted surfaces. Remove residue carefully before finishing the project.
A Simple Trick for Getting More Reliable MDF Joints
Here’s a practical habit that can make your next project easier: treat glue-up as a timed assembly, not an improvised event.
Before applying glue, put everything in its final position without adhesive. Confirm that the clamps fit, the pieces align, and you can tighten everything without scrambling.
Then take the boards apart, apply the adhesive, and repeat the same sequence.
Why does this help?
Wood glue has a limited open time—the period during which you can assemble the joint before the adhesive becomes too advanced in its setting process. If you’re still hunting for a clamp or figuring out which board goes where, you can waste valuable time.
A dry run reduces confusion and helps you work calmly.
For a larger project, glue one manageable assembly at a time rather than coating every component and hoping you can assemble the entire cabinet before the glue starts setting.
It’s not glamorous advice, but neither is repairing a joint that failed because you were busy looking for a pencil.
Frequently Asked Questions About Gluing MDF
What is the best glue for MDF board?
For most indoor DIY projects, a suitable PVA wood glue is a reliable starting point. For damp environments, unusual material combinations, or demanding applications, select an adhesive specifically rated for those conditions.
Can you glue MDF without screws?
Yes. Many MDF joints can be made using adhesive alone when the joint is well designed, the surfaces fit closely, and the adhesive is suitable for the job. Heavy loads or joints exposed to movement may require additional reinforcement.
How long does MDF glue take to dry?
It depends on the adhesive, temperature, humidity, and joint conditions. Some glues become firm relatively quickly, but full curing takes longer. Follow the manufacturer’s instructions for clamping, handling, and full cure times.
How do you glue MDF edges without them swelling?
Keep the edges dry, avoid flooding them with water-based adhesive, and clean up excess glue without soaking the board. If the project requires a particularly smooth finish, prepare the edges according to the adhesive and finishing product instructions.
Is construction adhesive better than wood glue for MDF?
Not necessarily. PVA wood glue is often suitable for close-fitting MDF-to-MDF joints. Construction adhesive may be preferable for certain installations or mixed-material assemblies, but only when its manufacturer approves the intended application.
Can you glue MDF to plywood or solid wood?
Yes, provided you choose an adhesive compatible with both materials and prepare the surfaces correctly. Because different materials can absorb adhesive differently and move differently with changes in moisture, follow the product instructions and account for the joint’s intended use.
Final Thoughts: Make Your MDF Joints Strong From the Start
Gluing MDF boards together isn’t complicated, but the little details make a big difference.
Choose an appropriate adhesive, prepare clean and accurately fitting surfaces, apply an even layer of glue, align the boards carefully, and clamp them firmly without crushing the material. Most importantly, allow the adhesive to cure according to the manufacturer’s instructions.
For many everyday indoor projects, good-quality PVA wood glue and careful preparation are all you need to get started. For more demanding joints, think about the joint design and whether screws, dowels, or other reinforcement would improve the finished assembly.
And remember the golden rule of DIY: measure twice, dry-fit once, glue carefully, and resist the urge to test your masterpiece before it’s ready.
Your MDF boards will thank you. Well, they won’t actually thank you—but they might stay together long enough for you to enjoy your hard work!