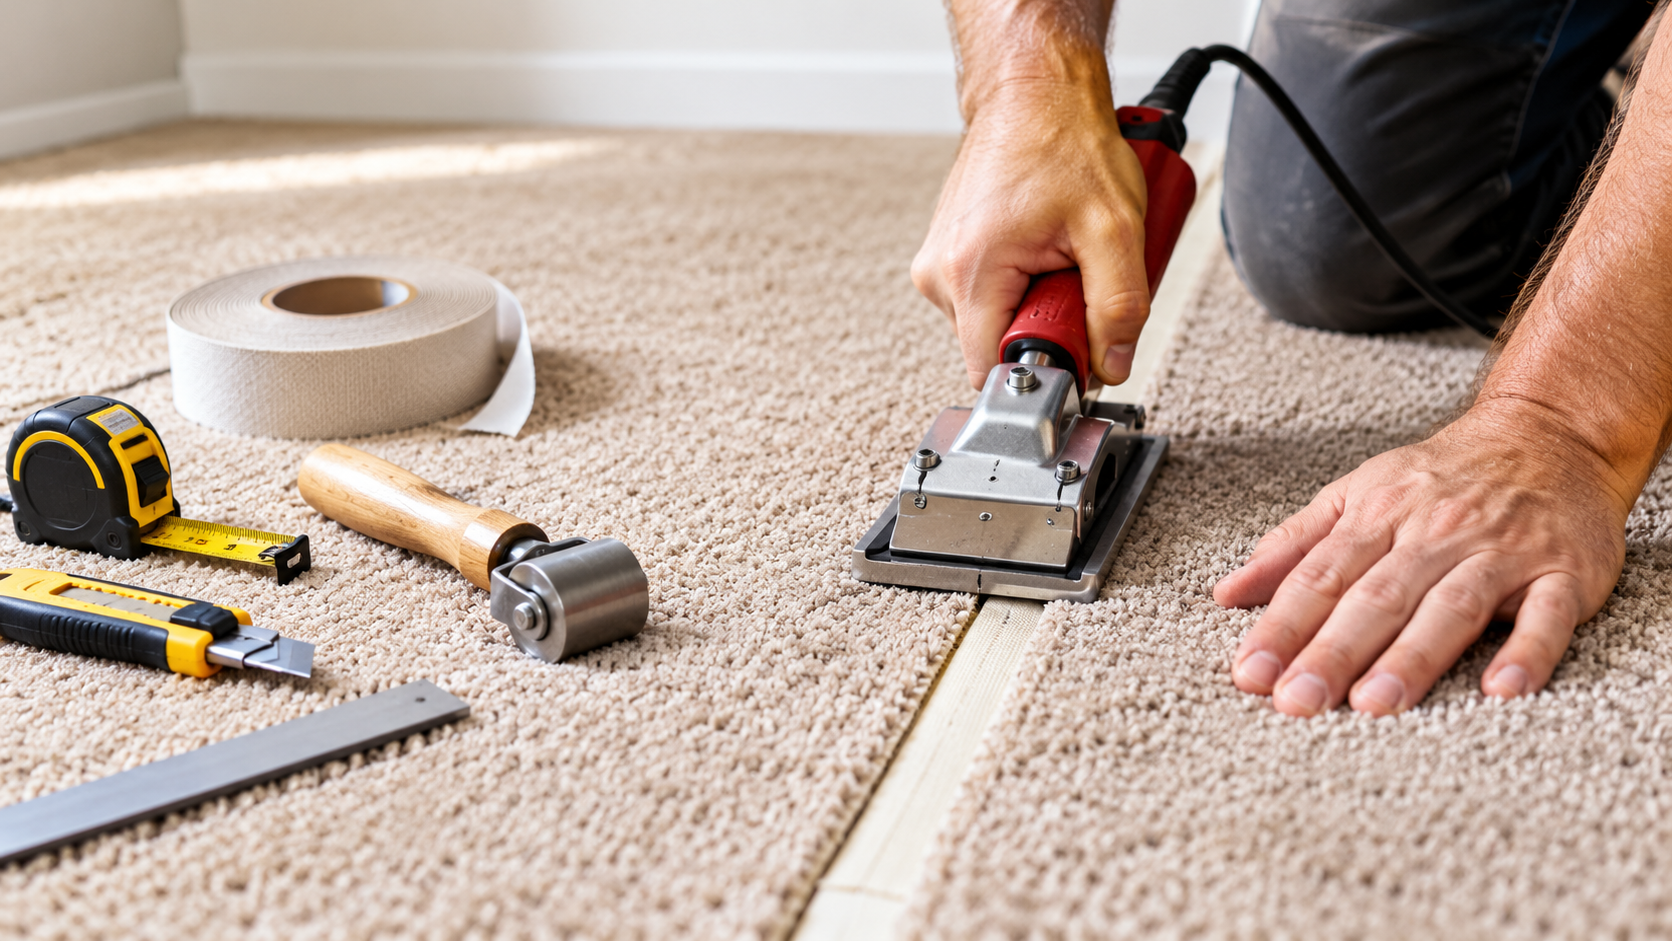
How to Seam Carpet with Tape: A Step-by-Step Guide
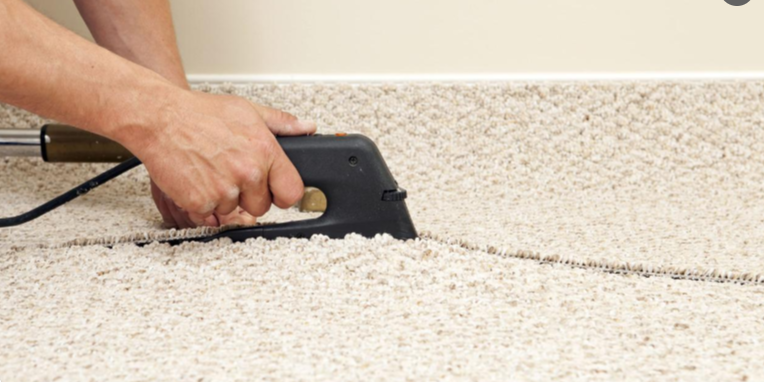
Have you ever installed a beautiful new carpet, stepped back to admire your work, and then spotted an annoying line running right through the middle of it? Suddenly, that lovely floor doesn’t look quite so lovely.
Thank you for reading this post, don't forget to subscribe!That line might be a poorly finished carpet seam. The good news is that learning how to seam carpet with tape can help you create a neat, durable join without automatically calling in a professional.
Whether you’re installing new carpet, joining two carpet sections in a large room, or repairing seams in carpet that have started to separate, this guide will walk you through the process.
We’ll cover the tools you need, how to prepare the edges, how to use carpet seam tape, and how to troubleshoot common problems. And don’t worry—we’ll keep things simple. No complicated flooring jargon that makes you feel like you need a university degree just to fix your living room.
What Is Carpet Seaming?
Carpet seaming is the process of joining two separate pieces of carpet so they form one continuous floor covering.
It’s often necessary when a room is wider than the available carpet roll or when carpeting a hallway, landing, or unusually shaped space.
The challenge is creating a strong joint that lies flat and blends into the surrounding carpet.
A properly finished seam should be secure, smooth, and as inconspicuous as the carpet’s construction allows.
One popular method is seaming carpet with tape. Special carpet seam tape bonds the backing of the adjoining pieces together. Depending on the product, this may involve a heat-activated adhesive and a dedicated seaming iron or a pressure-sensitive adhesive system.
Tools and Materials You Need
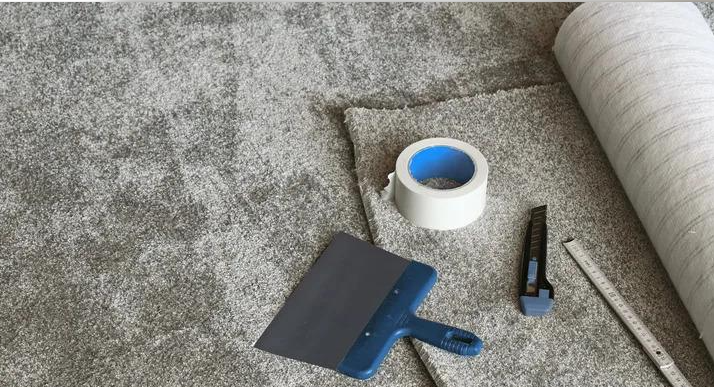
Before starting, gather these essential tools:
- Carpet seam tape: Choose a product designed for permanent carpet seaming and compatible with your carpet backing.
- Carpet seaming iron: Required for heat-activated seam tape.
- Carpet knife or sharp utility knife: For trimming clean, straight edges.
- Measuring tape: Helps you measure the room and carpet accurately.
- Straightedge or carpet seam cutter: Useful for preparing matching edges.
- Seam roller: Helps press the backing into the adhesive and blend the carpet pile.
- Knee kicker: Useful for positioning carpet during installation.
- Protective board or approved heat shield: Protects surrounding materials when recommended by the equipment manufacturer.
Remember, ordinary double-sided carpet tape isn’t necessarily suitable for permanent carpet seams. Check the product instructions before buying.
How to Seam Carpet with Tape: Step-by-Step Instructions
Step 1: Prepare the Floor and Carpet
Start with a clean, dry, level subfloor. Remove dust, debris, and anything else that could interfere with the installation.
Lay out both carpet pieces in their intended positions. Make sure you have enough material to cover the room without leaving gaps at the walls.
Check the direction of the carpet pile. If one piece faces the opposite direction, it may look lighter or darker than the other, even when both pieces are the same color.
It’s a little like wearing two black socks that somehow look like different shades of black. You know they’re supposed to match, but your eyes aren’t convinced.
Step 2: Align the Carpet Pieces
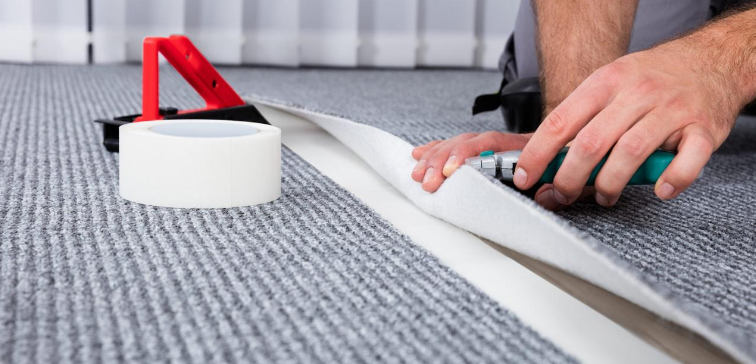
Position the two pieces so their edges meet naturally.
If your carpet has stripes, geometric shapes, or another pattern, take time to match the design before cutting. Patterned carpet may require extra material to achieve the correct alignment.
The edges should meet without overlapping. Gaps and overlapping edges can both create visible seams.
Once you’re satisfied with the alignment, keep the pieces in position while you prepare the joint.
Step 3: Trim the Carpet Edges
Use a sharp carpet knife or suitable seam cutter to create clean, matching edges.
Follow the carpet manufacturer’s cutting recommendations. Depending on the carpet construction, you may need to trim the factory edges or cut through the backing to produce a suitable joining surface.
Avoid cutting unnecessarily into the pile. Loose fibers and ragged edges can make the finished seam more noticeable.
Inspect both edges before continuing.
Pro tip: If you’re joining patterned carpet, double-check the pattern alignment after trimming. A perfectly straight seam with a badly mismatched pattern is still going to catch the eye.
Step 4: Position the Carpet Seam Tape
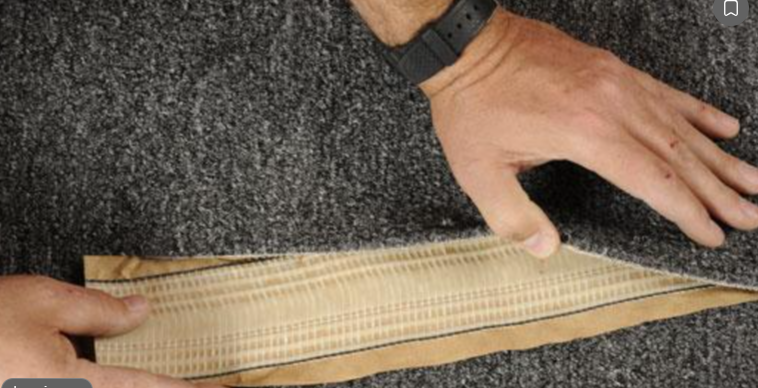
Lift or fold back the carpet edges carefully and position the seam tape underneath the joint, following the tape manufacturer’s instructions.
For heat-activated tape, the adhesive side must face the carpet backing as specified by the product instructions. Center the tape so both carpet edges can bond securely.
Bring the edges together and check that the tape is straight.
If you’re using pressure-sensitive seam tape, follow its specific application method instead. Not every tape uses heat, so don’t assume the installation process is identical.
Step 5: Heat the Tape with a Carpet Seaming Iron
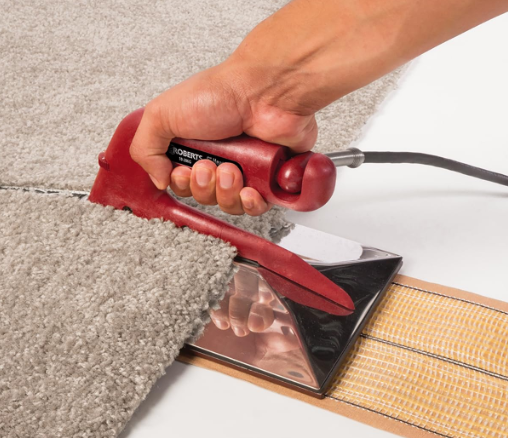
For heat-activated tape, allow your carpet seaming iron to reach the temperature recommended by the manufacturer.
Place the iron over the tape and move it steadily along the joint, allowing the adhesive to activate.
As you work, bring the carpet edges together over the tape without overlapping them.
Work in manageable sections. Rushing can lead to uneven bonding, while leaving the iron stationary for too long may scorch the carpet or damage the backing.
Always use the correct equipment and follow the safety instructions. A household clothes iron isn’t a safe substitute unless the product manufacturer explicitly approves it.
Step 6: Press the Carpet into the Adhesive
As the adhesive activates, ensure both carpet backings make proper contact with the tape.
Keep the edges aligned and avoid pulling the pieces apart while the adhesive is setting.
If the edges refuse to meet properly, stop and check their positioning. Forcing them together won’t correct a crooked cut or badly positioned tape.
A good seam should come together naturally without overlapping or leaving a noticeable gap.
Step 7: Roll the Seam and Allow It to Set
Once the seam has been bonded, use a compatible seam roller or carpet tractor if recommended.
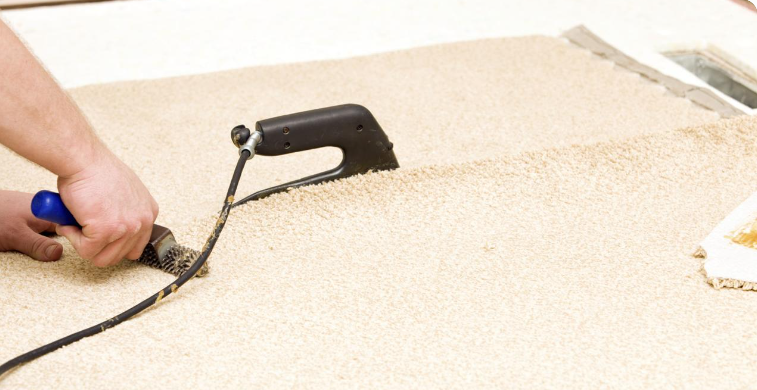
Roll gently along the joint to help press the carpet backing into the adhesive and blend the pile.
Avoid excessive pressure, which can damage some carpet fibers.
Allow the seam to cool or cure for the time specified by the manufacturer. Keep foot traffic off the joint until the adhesive has set sufficiently.
Step 8: Inspect and Finish the Seam
After the seam has cooled or cured, inspect it from several angles.
Check that the edges remain together, the joint lies flat, and no obvious gaps or raised areas are present.
Gently groom the carpet pile using a suitable brush or carpet tool to help the fibers blend across the joint.
If the seam is secure but slightly visible, the cause may be the pile direction, pattern, lighting, or carpet construction.
The goal is a strong, neat join—not necessarily a completely invisible seam.
How to Fix Visible or Separating Carpet Seams
Sometimes, carpet seams don’t behave as expected. They may lift, open up, or develop a raised ridge.
Here are the most common problems and their possible solutions.
Why Are My Carpet Seams Visible?
Visible seams may result from uneven cuts, mismatched pile direction, poor pattern alignment, or an inadequate adhesive bond.
Start by inspecting the seam under normal lighting.
If the edges are uneven or a gap is present, the joint may need to be reopened and repaired. If the seam is flat and secure, gently grooming the pile may improve its appearance.
How Do You Fix Separating Seams in Carpet?
Separating seams in carpet often indicate failed bonding, excessive tension, or damaged backing.
- Inspect the entire joint to identify the extent of the separation.
- Check for fraying, damaged backing, or loose adhesive.
- Lift the carpet carefully if the installation allows it.
- Remove failed tape where necessary and use a compatible replacement product.
- Rebond the edges following the appropriate installation instructions.
- Allow the adhesive to set before allowing normal foot traffic.
If the carpet keeps separating, the underlying problem may be poor stretching, damaged backing, or an unsuitable installation method. A professional installer can diagnose and correct these issues.
Never apply a hot iron directly to an installed carpet without checking the manufacturer’s instructions and protecting the flooring beneath it.
Why Is My Carpet Seam Bumpy?
A raised seam can be caused by overlapping edges, excess adhesive, poorly positioned tape, or an uneven subfloor.
Check whether the bump follows the joint or comes from underneath the carpet.
If the edges overlap, the seam may need to be reopened and trimmed correctly. If the subfloor is uneven, repairing the adhesive alone won’t solve the problem.
Avoid hammering or forcing the seam flat. You could damage the carpet backing without fixing the cause.
Tips for Making Carpet Seams Less Noticeable
Want your carpet to look as though it came from one enormous roll? These tips can help:
- Match the pile direction before cutting.
- Align visible patterns carefully.
- Use sharp cutting tools to create clean edges.
- Choose seam locations carefully where the room layout permits.
- Avoid overlapping the carpet edges.
- Use compatible seam tape and follow the correct heating or bonding procedure.
- Allow sufficient cooling or curing time.
- Groom the pile gently after the joint has set.
Good preparation makes a tremendous difference. Taking a few extra minutes to align and trim the carpet properly can save hours of frustration later.
Is Carpet Seam Tape Better Than Glue?
Neither method is automatically better for every carpet.
Heat-activated seam tape is commonly used with compatible carpet installations because it bonds the carpet backing to adhesive beneath the joint.
Other systems use specialized seam adhesives or pressure-sensitive products.
The right choice depends on the carpet backing, installation method, and manufacturer’s recommendations.
For a permanent seam, always use a product designed for that purpose. General-purpose adhesive or ordinary double-sided tape may not provide the required strength.
Frequently Asked Questions
Can I seam carpet myself?
Yes. Straightforward carpet seams can be a DIY project if you have the correct materials, suitable tools, and enough patience to prepare the edges properly.
What is the best tape for seaming carpet?
Use carpet seam tape specifically designed for your carpet and installation method. Heat-activated tape generally requires a compatible seaming iron, while pressure-sensitive systems follow different instructions.
How long does carpet seam tape take to set?
Heat-activated tape generally needs time to cool and bond, while adhesive-based products may require a specified curing period. Follow the manufacturer’s instructions before walking on the seam.
Should carpet seams be completely invisible?
Not necessarily. Some seams remain faintly visible because of the carpet’s pile, color, pattern, or lighting. They should ideally be flat, secure, and as inconspicuous as possible.
Can I repair carpet seams without replacing the tape?
Sometimes. If the existing tape remains intact and the carpet manufacturer permits a compatible repair adhesive, a small repair may be possible. If the original bond has failed, replacing the damaged tape may be more reliable.
Why do carpet seams keep separating?
Possible causes include failed adhesive, poor edge preparation, excessive tension, unsuitable tape, and damaged backing. Repeated separation usually requires correcting the underlying problem rather than simply covering the gap.
Final Thoughts
Learning how to seam carpet with tape is easier when you break the job into manageable steps.
Prepare the floor, align the carpet pieces, trim the edges carefully, position the tape correctly, and follow the manufacturer’s bonding instructions. Then give the seam enough time to set before inspecting the finished joint.
If you get those basics right, you’ll have a much better chance of achieving a neat, durable finish.
And remember: your carpet doesn’t have to be perfect on the first try, but measuring twice and cutting once is still a pretty good way to avoid turning a weekend DIY project into a flooring-related comedy.
Take your time, use the right tools, and enjoy the satisfaction of a job well done.